Upcycling 101: Turn Trash into Trendy Home Decor

The latest trend in sustainable living is upcycling—the process of transforming discarded items into something new and useful. Upcycling is a creative and eco-friendly way to reduce waste and give new life to old items. With a bit of imagination and some simple techniques, you can turn trash into trendy home decor that is unique, personalized, and kind to the planet.

So, where do you start? First, develop an eye for potential. Look beyond an item’s current state and envision its transformative possibilities. That old, worn-out shirt could become a cozy throw pillow, and those discarded wooden crates could find new purpose as a rustic bookshelf. It’s all about seeing the hidden potential and thinking outside the box.

Scour thrift stores, garage sales, and even your own attic or basement for items that could be upcycled. You’d be surprised at the abundance of raw materials just waiting to be given a new lease of life. Keep an open mind and let your creativity guide you. Upcycling is not just about recycling; it’s about creating something truly special that reflects your personal style.

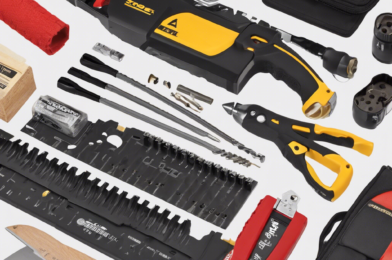
Once you’ve gathered your materials, it’s time to get crafty. Upcycling techniques vary widely depending on the project, but some basic skills to have in your toolbelt include sewing, woodworking, painting, and basic repair. Don’t be intimidated – many upcycling projects are simple and perfect for beginners. There are plenty of online tutorials and inspiration to get you started.

One of the simplest ways to upcycle is to give new life to old furniture. A fresh coat of paint or some creative reupholstering can completely transform a piece. Add a personal touch with decorative knobs or unique hardware. Even better, scour the flea markets and second-hand stores for unique furniture finds that just need a little TLC.

Another easy way to upcycle is to turn old jars and bottles into stylish storage solutions or decorative vases. A bit of paint, some twine, or perhaps a coat of metallic spray paint can instantly elevate these otherwise discarded items into something special. Fill them with dried flowers or use them to organize your kitchen or bathroom – the possibilities are endless.

If you’re feeling more adventurous, try your hand at transforming old tires into an outdoor ottoman or a swing for your porch. Old suitcases can become unique end tables, and skateboards can be upcycled into funky shelves. The world of upcycling is limited only by your imagination.

Remember, upcycling is about more than just trendy home decor. It’s about reducing waste, conserving resources, and embracing a more sustainable lifestyle. So, not only will you have fun and create something unique, but you’ll also be doing your part for the planet.

Improve Indoor Air Quality: Easy Steps for a Healthier Home

The air we breathe indoors can have a significant impact on our health and well-being. With many of us spending the majority of our time inside, especially in the cooler months, taking steps to improve indoor air quality is crucial for a healthier home environment. Poor indoor air quality can lead to a range of issues, from allergies and asthma to more serious respiratory problems. But don’t despair! There are several easy and effective steps you can take to enhance the air quality in your home and create a healthier living space for you and your family.

First and foremost, one of the simplest ways to improve indoor air quality is to open your windows regularly. Allowing fresh air to circulate helps dilute and remove pollutants that may be trapped inside. If you live in an area with high outdoor air pollution, consider investing in a portable air purifier with a HEPA filter. These devices can effectively capture small particles and allergens, such as dust, pollen, and pet dander, helping to keep your indoor air clean and fresh.

Keeping your home clean is another important step in improving air quality. Regularly vacuuming and mopping can reduce the amount of dust and allergens that accumulate, especially on hard surfaces and floors. Be sure to use a vacuum with a HEPA filter to ensure that particles are trapped inside the vacuum instead of being released back into the air. Additionally, try to avoid using harsh chemical cleaning products, as these can release volatile organic compounds (VOCs) that contribute to indoor air pollution. Opt for natural, eco-friendly cleaning solutions, or make your own using simple ingredients like vinegar and baking soda.

Another often-overlooked factor in indoor air quality is the presence of mold and mildew. These allergens can thrive in damp environments, such as bathrooms and basements. To prevent their growth, ensure that these areas are well-ventilated and that any leaks or water intrusions are promptly addressed. Dehumidifiers can also help maintain the proper humidity levels in your home, making it less hospitable to mold and mildew.

Improving indoor air quality can also be achieved by bringing the outdoors inside. Adding houseplants to your décor does not only enhance the aesthetic of your space but also naturally improves air quality. Certain types of houseplants, such as spider plants, peace lilies, and aloe vera, are known for their air-purifying properties. They absorb carbon dioxide and release oxygen, while also helping to remove common indoor air pollutants.

Remember to be mindful of potential air pollutants emitted by common household items. Scented candles, for example, may create a cozy ambiance, but they can release soot and other harmful particles into the air. Similarly, be cautious when using fireplaces or gas stoves, as they can emit carbon monoxide and other dangerous gases. Always ensure proper ventilation and install carbon monoxide detectors in your home for added safety.

Improving indoor air quality can also be achieved by making thoughtful choices when it comes to home improvement projects. Opt for low-VOC or no-VOC paints and finishes to reduce exposure to harmful chemicals. When replacing flooring or furniture, look for products made from natural materials, such as solid wood or natural linoleum, instead of those containing synthetic chemicals or formaldehyde. These simple choices can make a big difference in the long-term air quality of your home.

Finally, be mindful of potential sources of secondhand smoke in your home. If anyone in your household smokes tobacco, encourage them to do so outdoors to prevent the buildup of harmful particles and gases indoors. This not only improves the air quality but also reduces the risk of secondhand smoke exposure for non-smokers in the household. Taking these simple steps can significantly improve the indoor air quality in your home, creating a healthier environment for you and your loved ones. Remember to maintain good ventilation, keep your space clean, and be mindful of the potential pollutants that may be present in common household items. By making just a few small changes, you can breathe easier and enjoy the comfort of a healthier home.

5 Weekend DIY Projects That Boost Home Value

The thought of renovating your home can be daunting, but there are plenty of simple DIY projects that can make a big difference in its value. Whether you’re looking to sell soon or simply want to improve your living space, investing time and energy into these five weekend projects will pay off.

First impressions count, so start with the curb appeal. A fresh coat of paint on the front door, new house numbers, and some potted plants by the entrance can make a world of difference. This simple project can be completed in a day and will set the tone for the rest of your home.

Next, turn your attention to the kitchen. Updating your cabinets can be as easy as swapping out the hardware and giving them a fresh stain or coat of paint. This simple project can modernize the space and, depending on the size of your kitchen, can be completed in a weekend.

Then, consider updating your light fixtures. Swapping out outdated fittings for more modern options can instantly elevate a space. Opt for energy-efficient models to also reduce your utility bills.

The bathroom is another area where small changes can have a big impact. Re-grouting tiles and swapping out an old faucet for a new model will make the space feel fresh and contemporary. If you’re feeling adventurous, you could even try tiling a feature wall for a unique touch.

A simple yet effective project is to deep clean and seal your driveway. This will instantly improve the appearance of your home’s exterior and protect it from the elements. Sealing your driveway can be a quick and easy DIY project that makes a big difference.

For a quick win, try updating your interior doors. Replacing old, hollow doors with solid wood options will reduce noise transfer between rooms and give your home a more luxurious feel. It’s a straightforward project that can be completed in a day.

Finally, give your walls a fresh coat of paint. A new color or even just a refresh of the existing shade will make the space feel brand new. Opt for a neutral shade to appeal to a wider range of buyers if you’re planning to sell.

By tackling these simple DIY projects, you can cost-effectively boost the value of your home and create a more enjoyable space for you and your family. So, grab your tools and get ready to transform your home this weekend.

Paint Like a Pro: Tips for a Flawless Finish

Preparing surfaces, selecting the right tools, and mastering painting techniques are key to achieving a flawless paint finish. Whether you’re refreshing a room or tackling a large-scale project, these pro tips will help you paint like an expert and deliver seamless results.

First, preparation is key. Ensure surfaces are clean, dry, and free of dust, debris, or grease. Repair any holes or cracks and sand down uneven areas to create a smooth base. Proper surface prep is essential for paint adherence and a lasting finish. Take time to protect adjacent areas with drop cloths or painter’s tape, ensuring a tidy and controlled painting environment.

Selecting the right tools for the job is crucial. Choose high-quality brushes and rollers suited to your paint type and surface. Natural bristles are ideal for oil-based paints, while synthetic bristles work well with water-based latex paints. Consider the nap length of rollers, with shorter naps for smoother surfaces and longer naps for textured walls. Don’t skimp on paint quality – invest in reputable brands with good coverage and durability.

Master the art of cutting in, a technique used to paint crisp, straight edges along ceilings, trim, and corners. A steady hand and a good-quality angled brush are essential. Start by loading your brush with paint, removing excess, and painting a fine line along the edge. Practice makes perfect, so take your time and be patient.

Easy Bathroom Updates You Can Do in a Day

Giving your bathroom a quick refresh can be easier than you think! With just a few simple updates, you can transform your space and create a whole new look and feel. Whether you’re looking for a quick DIY project or wanting to make some inexpensive changes, there are plenty of options to choose from that can be completed in just a day. So, if you’re ready to give your bathroom a mini-makeover, here are some easy updates that will make a big impact.

First things first, consider updating your bathroom’s hardware. This can include switching out the old cabinet knobs and drawer pulls for something more modern or unique. You’d be surprised at how much of a difference this small change can make! Plus, it’s a quick and easy project that can be done in just a few hours. While you’re at it, think about updating your faucet and showerhead. These days, there are so many stylish and water-efficient options available that can instantly elevate the look and feel of your bathroom.

Another easy update is to install new lighting. The right lighting can not only brighten up your space but can also create a relaxing and indulgent atmosphere. Consider adding a statement light fixture or some stylish wall sconces to really elevate the room. If you’re renting or looking for a non-permanent option, there are plenty of adhesive light fixtures available that won’t damage your walls.

Give your bathroom a fresh coat of paint for an instant update. A new color can completely transform the space and make it feel brand new. There are plenty of paint options available specifically designed for bathrooms that can withstand moisture and steam. From soothing neutrals to bold and dramatic hues, the possibilities are endless! Don’t forget to add some personality with artwork and decorations. Bathroom-friendly artwork that can handle humidity is now widely available. Alternatively, you can create a gallery wall with pictures and mementos that make you smile.

Updating your shower curtain and towels is an easy and inexpensive way to give your bathroom a style refresh. Opt for a unique pattern or a colorful design to make a statement. You can even get creative and make your own shower curtain using fabric and a basic curtain kit! If you have a little more time and money to invest, consider retiling your bathroom. It might sound like a big job, but with self-adhesive tiles, it’s a project that can be completed in a day and without the need for a professional.

Bring the outdoors in with some lush greenery. Adding plants to your bathroom not only looks great, but it can also help improve air quality and create a soothing atmosphere. Opt for plants that thrive in humid environments, such as ferns, orchids, and snake plants. Finally, don’t forget about the small details! Update your soap dispensers, toothbrush holders, and other bathroom accessories for a cohesive and stylish look. Choose a matching set or mix and match patterns and textures for an eclectic feel.

With these simple updates, you can quickly and easily transform your bathroom into a space that feels fresh and new. So, take a day to refresh your bathroom and enjoy your updated space!

Green Home Improvements: Save Energy and Money

Making energy-efficient upgrades to your home can significantly reduce your carbon footprint and save you money in the long run. Green home improvements are a wise investment for any homeowner looking to reduce their environmental impact and increase their energy savings. So, where should you start?

One of the most effective ways to improve your home’s energy efficiency is to focus on insulation and sealing. Proper insulation ensures your home retains heat during winter and stays cool in the summer, reducing the need for excessive heating or air conditioning. Seal any gaps or cracks in your walls, floors, and ceilings to prevent air leakage, which can lead to energy loss and higher utility bills. This simple step can make a big difference in your energy costs.

Upgrading to energy-efficient appliances is another smart move. Look for the Energy Star label when purchasing new appliances, as these products meet strict energy efficiency guidelines set by the US Environmental Protection Agency. Energy Star-certified appliances, such as refrigerators, washing machines, and dishwashers, use less energy and water, helping you save on utility bills and reduce your carbon footprint.

Improving your home’s energy efficiency doesn’t stop at appliances. You can also make a significant impact by upgrading your lighting. LED bulbs use up to 90% less energy than incandescent bulbs and last much longer, reducing the need for frequent replacements. Making the switch to LED lighting is an easy and effective way to save energy and money, and it also reduces your contribution to the 4 million metric tons of annual CO₂ emissions attributed to traditional incandescent bulbs.

Kitchen Makeover on a Budget: 10 Affordable Ideas

Kitchen makeovers can be expensive and time-consuming, but they don’t have to break the bank. Whether you’re looking to refresh your space on a budget or make some affordable upgrades, here are ten great ideas to get you started on a wallet-friendly kitchen transformation.

First, consider a coat of paint. A fresh color can instantly update your kitchen, and painting the walls or cabinets yourself will save on labor costs. Opt for neutral shades or pastels for a timeless look, or go bold with a pop of color on a feature wall or the island. Don’t forget the power of a good primer to ensure a long-lasting finish. Take it a step further and change the look and feel of the room by adding some texture or a faux finish technique, like sponging or ragging, for a unique and custom look.

New hardware is an easy and inexpensive update that can drastically change the look and feel of your kitchen. Swap out those old knobs and pulls for something more modern or funky. Go for a sleek, minimalist look with hidden or built-in handles, or add a touch of glamour with crystal or brass hardware. Don’t be afraid to mix and match styles and finishes to create a unique look that reflects your taste. You can also try updating your cabinet doors with some inexpensive molding to create a custom, high-end look. Adding some trim or molding is a simple DIY project that can frame your cabinets and give them a brand-new feel.

A quick and affordable update is to change up your kitchen’s lighting. Try swapping out that old fixture for a stylish new pendant light or a chic set of sconces. Not only will this brighten up your space, but it can also help set the mood and create a cozy ambiance. With a range of affordable options available, you can really change the whole feel of the room.

One often-overlooked area is the backsplash; a new backsplash can instantly update and transform your kitchen. There are many budget-friendly options available, from peel-and-stick tiles to affordable real-tile options. You can create a unique and colorful feature in your kitchen with this simple update, adding a whole new dimension to the room.

These are just a few ideas to get you started on a budget-friendly kitchen makeover. With a little creativity and some elbow grease, you can achieve a beautiful and functional space without spending a fortune.

Now, for a quick and easy update, try adding some open shelves. Not only will this create a stylish and unique look, but it’s also a great way to show off your favorite dishes, glasses, or cookware. It’s a budget-friendly way to add some extra storage and a decorative touch. You could also create a fun gallery wall or display some artwork to bring in some color and personality without breaking the bank.

Lastly, don’t forget the power of a deep clean and declutter. A sparkling clean kitchen will feel brand new, and it won’t cost you a thing. Get rid of any unnecessary items and appliances that are cluttering your countertops, and consider using storage solutions like baskets or canisters to keep your space organized and efficient. This instant refresh will make your kitchen feel more welcoming and help you fall in love with it all over again.

DIY Disasters: How to Avoid and Fix Common Mistakes

Taking on a do-it-yourself (DIY) project can be a fun and rewarding experience, but it’s not without its pitfalls. Even the most careful and experienced DIYers can run into problems, and mistakes can be costly and time-consuming to fix. However, there are ways to minimize the risk of disaster and turn your project into a success. Here are some tips to help you avoid common DIY mistakes and turn your vision into a reality.

First and foremost, proper planning is essential. Rushing into a project without a clear plan is a recipe for disaster. Take the time to research and understand the scope of the project, the tools and materials required, and the step-by-step process involved. There are countless online tutorials and guides available, so take advantage of these resources to familiarize yourself with the project before you begin.

Another crucial aspect is to assess your skill level honestly. It’s important to know your limits and not bite off more than you can chew. If you’re a beginner, start with simpler projects and work your way up as you gain experience and confidence. It’s better to err on the side of caution and seek professional help for complex projects than to attempt something beyond your capabilities and end up with a costly mistake.

Ensuring you have the right tools for the job is vital. Investing in high-quality tools can make a significant difference in the outcome of your project. While it may be tempting to cut corners and make do with what you have, using inappropriate tools can lead to subpar results and potential safety hazards. Take the time to gather the necessary tools and familiarize yourself with their proper use before embarking on your project.

One of the most common pitfalls of DIY projects is underestimating the materials required. Carefully calculate and plan for the amount and type of materials needed to complete the project. Purchasing slightly more than you think you need can save you from running out halfway through and having to scramble for matching materials.

A messy workspace can lead to mistakes and accidents. Keep your work area organized and free of clutter. Having a clear and designated space to work not only makes the process more enjoyable but also helps prevent accidents and keeps your project running smoothly.

DIY projects can be time-intensive, so it’s important to manage your time effectively. Don’t try to rush through a project, as this often leads to mistakes. Set aside dedicated blocks of time to work on your project and be patient with the process. Taking your time will result in a higher-quality outcome and a more satisfying experience.

Finally, safety should always come first. Depending on the project, there may be inherent risks involved. Always wear the necessary safety gear, such as gloves, eye protection, and a respirator. Be cautious when using power tools, and ensure you are well-informed about the safe usage of any chemicals or materials. Following safety protocols will help ensure your DIY project is enjoyable and accident-free.

By following these tips and approaching your project with patience and diligence, you can avoid common DIY disasters and create something truly remarkable. Remember, proper planning, honest self-assessment, and a focus on safety will set you up for success in any DIY endeavor. Happy crafting, building, and creating!

Tool Essentials: Build Your DIY Kit Without Breaking the Bank

Whether you’re a seasoned pro or a beginner, building a comprehensive DIY tool kit can be an expensive endeavor. The vast array of tools available can be overwhelming, and it’s hard to know where to start. Fear not – with a bit of planning and savvy shopping, you can build an impressive arsenal without spending a fortune. In this article, we’ll guide you through the essentials, offering tips on how to prioritize your purchases and find the best deals.

Start with the basics. Every DIY enthusiast needs a good set of hand tools, including a hammer, screwdrivers, a tape measure, a level, and a utility knife. These are the workhorses of any tool kit and will be used time and again, so it’s worth investing in quality. Look for reputable brands that offer lifetime warranties, ensuring you’re covered if anything breaks.

Next up, consider your power tools. A drill/driver is a must-have, offering versatility for a range of tasks. Go for an 18V or 20V model, which will provide ample power for drilling into wood, metal, and even masonry with the right drill bits. Keep an eye out for combo kits, which often offer great value, pairing a drill with an impact driver – incredibly useful for driving long screws or tightening nuts.

Don’t forget your safety gear. Protective eyewear and ear defenders are essential when working with power tools, and a good respirator will protect your lungs from dust and fumes. These are areas where you don’t want to skimp on quality, so be sure to read reviews and opt for trusted brands.

When it comes to shopping, take advantage of sales and promotions, and don’t be afraid to buy used. Sites like eBay and Craigslist are treasure troves for second-hand tools, often at a fraction of the retail price. Local pawn shops and garage sales are also worth checking out for hidden gems.

Another way to save is to look for tool kits or bundles that offer a selection of commonly used tools together. This can be more cost-effective than buying each item individually and ensures you have a cohesive set that’s ready to go.

When it comes to more specialized tools, such as those for plumbing or electrical work, consider renting or borrowing. Unless you plan on using these tools regularly, it’s not worth the expense of buying them outright. Many home improvement stores offer rental services at reasonable daily or weekly rates.

Finally, remember that building your DIY tool kit is a gradual process. Take the time to research, compare prices, and read reviews before making a purchase. With patience and smart shopping, you’ll soon have a comprehensive collection of tools that will last for years to come.

Curb Appeal 101: Make Your Home Stand Out

Enhancing your home’s curb appeal is an art that can boost your property value and make your home the envy of the neighborhood. With a few simple tricks, your home can stand out from the street and become a showcase of your personal style. First impressions count, so let’s delve into the world of curb appeal and uncover the secrets to making your home shine.

The exterior of your home is the first thing people see when they visit or pass by, so it’s important to keep it well-maintained and visually appealing. A fresh coat of paint on the front door can do wonders, and don’t underestimate the power of a well-manicured lawn. Keep the grass trimmed and the garden beds tidy, and consider adding some colorful foliage or flowers to boost your home’s curb appeal instantly. Symmetry and balance are visually appealing, so ensure your windows, shutters, and doors are all in alignment and well-proportioned.

Enhancing the lighting in your outdoor space is another great way to improve curb appeal. It not only adds a layer of safety and security but also highlights the beautiful features of your home after dark. Consider installing solar-powered path lights to guide visitors up to your door and create a warm and welcoming ambiance.

Your mailbox is another often-overlooked feature that can be a focal point with a little creativity. Whether you opt for a unique design or add a splash of color, your mailbox can become a fun and functional part of your home’s exterior. Don’t forget to maintain and repair any damaged elements, such as cracked siding or broken steps, as these can detract from the overall appeal of your home.

Curb appeal is all about the little details, so pay attention to the smaller features, too, such as house numbers, door knobs, and even the welcome mat. Upgrading these small touches can make a big difference and showcase your attention to detail. Adding some outdoor art or a unique garden sculpture can also infuse your personal style into your home’s exterior and make it truly one-of-a-kind.

Remember, curb appeal goes beyond aesthetics and can actually increase the value of your home. Well-maintained and attractive homes tend to appraise higher, and if you’re looking to sell, it can be a huge advantage. Even if you’re not planning to sell anytime soon, investing in your home’s exterior boosts your enjoyment and pride in your space.

By implementing these simple tips and adding your personal touch, you can transform the curb appeal of your home and make it stand out from the rest. A little effort goes a long way, and you’ll be surprised at the impact these changes can make.